
Introduction to Classic Ensaymada Bread
What is Classic Ensaymada Bread?
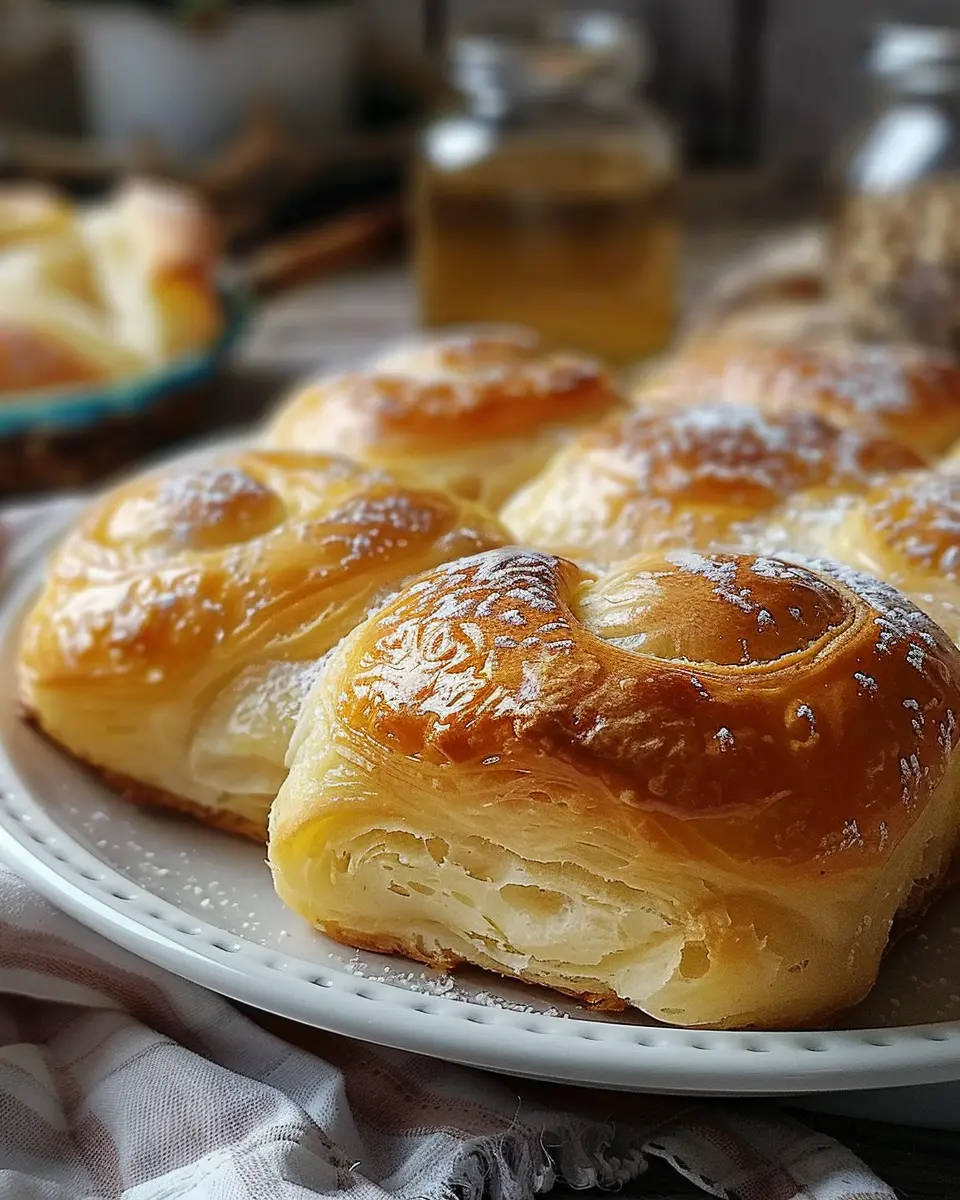
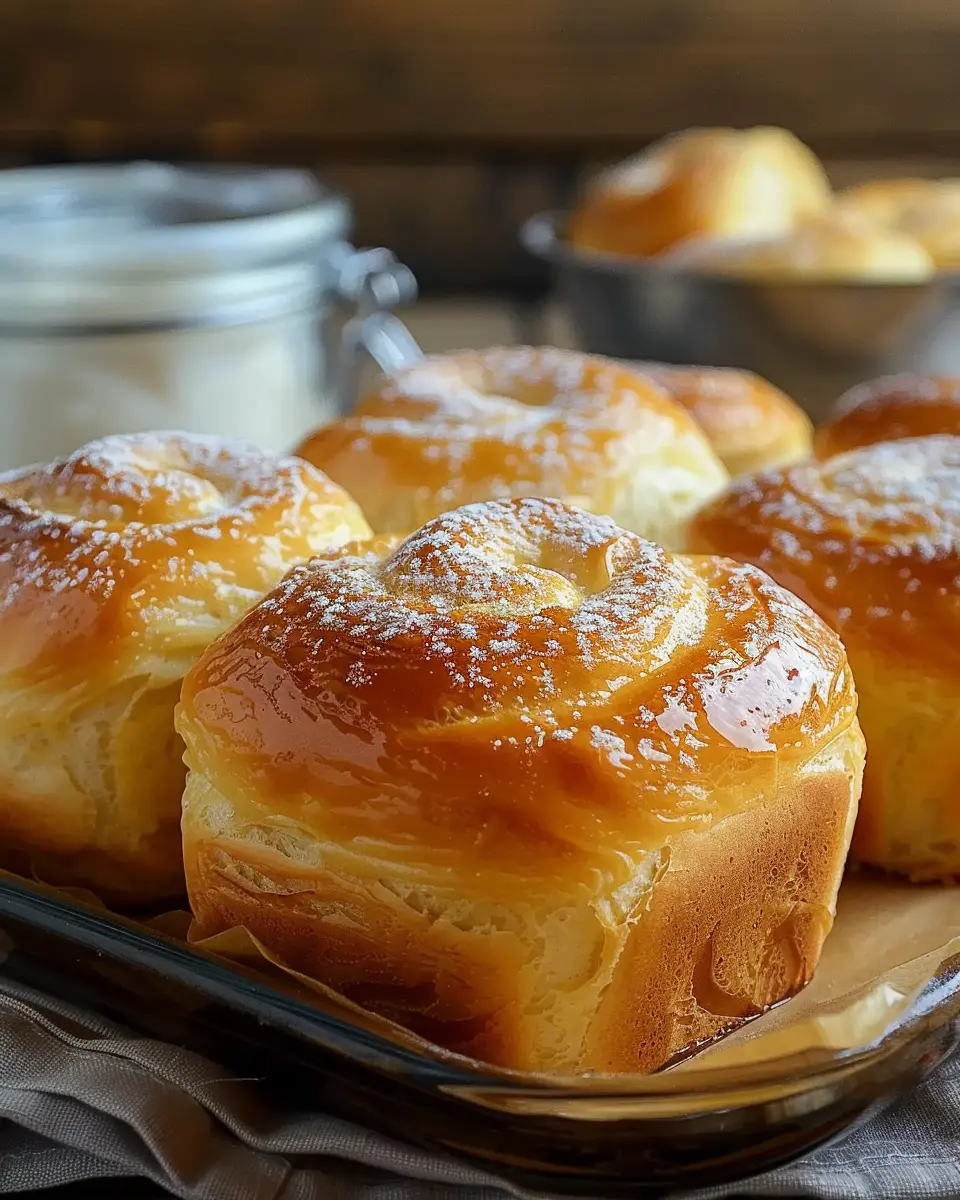
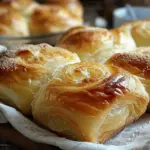
Have you ever tried a warm, fluffy classic ensaymada bread? Originating in the Philippines, this delightful pastry is not just a treat but an experience. Traditionally, ensaymada is a sweet, buttery bread topped with a mix of queso de bola (edam cheese) and a sprinkle of sugar, making it the perfect combination of savory and sweet. Its rich texture and enticing aroma can transport you straight to a cozy café or a family gathering, where it’s often served during festive occasions or as an everyday snack.
If you want to explore its fascinating history, this article about Filipino baked goods is a great starting point. Besides being a personal favorite of many, classic ensaymada holds a special place in Filipino culture, symbolizing warmth, love, and hospitality. So, there’s something truly heartwarming about making these soft rolls at home.
Why Make It at Home?
You might wonder, why go through the effort of making classic ensaymada bread at home? Well, let me tell you, the experience is worth it for several reasons:
-
Customization: When you bake at home, you control the ingredients. Want to add a sprinkle of cinnamon or raisins? The choice is yours! You can tailor every batch to your taste.
-
Freshness: There’s nothing like the smell of freshly baked bread wafting through your home. It makes your space feel cozy and inviting, creating a perfect atmosphere for gatherings or a peaceful evening alone.
-
Quality Time: Baking is not just about creating delicious food; it’s an opportunity to spend quality time with friends or family. Imagine laughing and chatting in the kitchen while the dough rises and transforms into delightful rolls.
-
Learning Experience: Trying your hand at baking ensaymada bread is a chance to improve your skills and gain culinary confidence. Plus, it’s a fun way to share a piece of your culture with others.
So, are you ready to dive into the world of classic ensaymada? To get started, check out this guide for tips on bread-making techniques, and let’s embark on this baking adventure together!
Ingredients for Classic Ensaymada Bread
Essential ingredients
Creating that delectable classic ensaymada bread begins with the right foundation. Here are the must-have ingredients you’ll need:
- All-purpose flour: This is the backbone of your ensaymada. It creates that fluffy, soft texture we all love.
- Milk: Warm milk is crucial for activitating yeast and enriching the dough.
- Yeast: Use instant or active dry yeast for proper dough rise.
- Butter: Unsalted butter adds richness and flavor to your bread.
- Sugar: Granulated sugar sweetens your loaf, making it irresistible.
- Eggs: They enhance the dough’s richness and moisture.
You can find most of these ingredients at your local grocery store, or check out online baking stores like King Arthur Baking for specialty items.
Optional add-ins
While the base recipe is already amazing, consider these optional ingredients to elevate your classic ensaymada bread:
- Cheese: A sprinkle of grated cheese on top can add a savory twist.
- Cinnamon: For a subtle spice, add a dash of cinnamon into the dough.
- Nuts: Chopped nuts can introduce a satisfying crunch.
These add-ins can personalize your ensaymada, making them uniquely yours. So, what’s holding you back? Let’s get baking!
Preparing Classic Ensaymada Bread
When it comes to baking, classic ensaymada bread is a timeless treat that’s well-loved for its soft, fluffy texture and rich, buttery flavor. Whether it’s for breakfast, snack time, or dessert, making your own ensaymada at home can be immensely satisfying. Let’s walk through the process step-by-step to ensure your baking adventure is as delightful as the treat itself!
Gather and Prepare Your Ingredients
Before diving into baking, it’s important to have all your ingredients at your fingertips. Ensure that you have the following essentials ready:
- All-purpose flour
- Granulated sugar
- Salt
- Active dry yeast
- Warm milk (not too hot!)
- Butter, softened
- Eggs (preferably at room temperature)
Make sure you measure everything accurately for the best results. Pro tip: using a kitchen scale can provide precision, ensuring that your classic ensaymada bread turns out perfectly every time.
Activate the Yeast
Now that you have your ingredients organized, it’s time to activate the yeast.
- Pour warm milk into a small bowl.
- Sprinkle the yeast over the milk along with a teaspoon of sugar. Let it sit for about 5-10 minutes. You’ll know it’s ready when it becomes frothy—this means the yeast is active and ready to help your dough rise!
Curious about why yeast is so crucial? It’s the magic ingredient that gives your ensaymada that lovely fluffiness.
Mix the Dry Ingredients
In a large mixing bowl, combine your dry ingredients:
- All-purpose flour
- Remaining sugar
- Salt
Whisk them together until evenly mixed. If you’re wondering, keeping the salt separate from the yeast is important until you’re ready to mix everything together. Salt can inhibit yeast growth if added too soon.
Combine Wet Ingredients
In another bowl, beat your eggs and add in the activated yeast mixture along with the softened butter. Mix these wet ingredients together until well combined.
This is where the classic ensaymada bread starts to get its creamy richness! You can also think of this step as merging winters with spring—the warm, buttery goodness merging with the frothy yeast is a baking match made in heaven.
Form the Dough
Gradually integrate the dry ingredients into the wet ingredients until a rough dough forms.
At this stage, don’t be too worried about making it perfect; just make sure everything is well-combined.
Knead the Dough
Once your dough has come together, it’s time to knead.
- Transfer it onto a lightly floured surface and knead for about 8-10 minutes. You want your dough to be smooth and elastic.
Kneading is a workout, but it’s also cathartic! You’ll start to feel the magic happening, and trust me—a good knead makes a world of difference in your final product.
Let It Rise
Place your dough in a lightly oiled bowl, cover it with a kitchen towel, and let it rise in a warm, draft-free area for about 1 to 2 hours. Look for it to double in size! This is where the yeast does its job, making your classic ensaymada bread airy and light.
Shape the Ensaymada
After the dough has risen, punch it down and transfer it to your floured surface.
- Divide it into equal pieces, usually around 50-75 grams each.
- Roll out each piece into a log, and then coil it in a spiral shape.
Each mini ensaymada should be as welcoming as a hug, so don’t rush this part.
Second Rise
Arrange your shaped ensaymada on a parchment-lined baking sheet, leaving some space between them. Cover them again and allow them to rise for another 30-45 minutes. This second rise enhances the texture even more.
Baking the Ensaymada
Preheat your oven to 350°F (175°C). Once preheated, pop your ensaymada in!
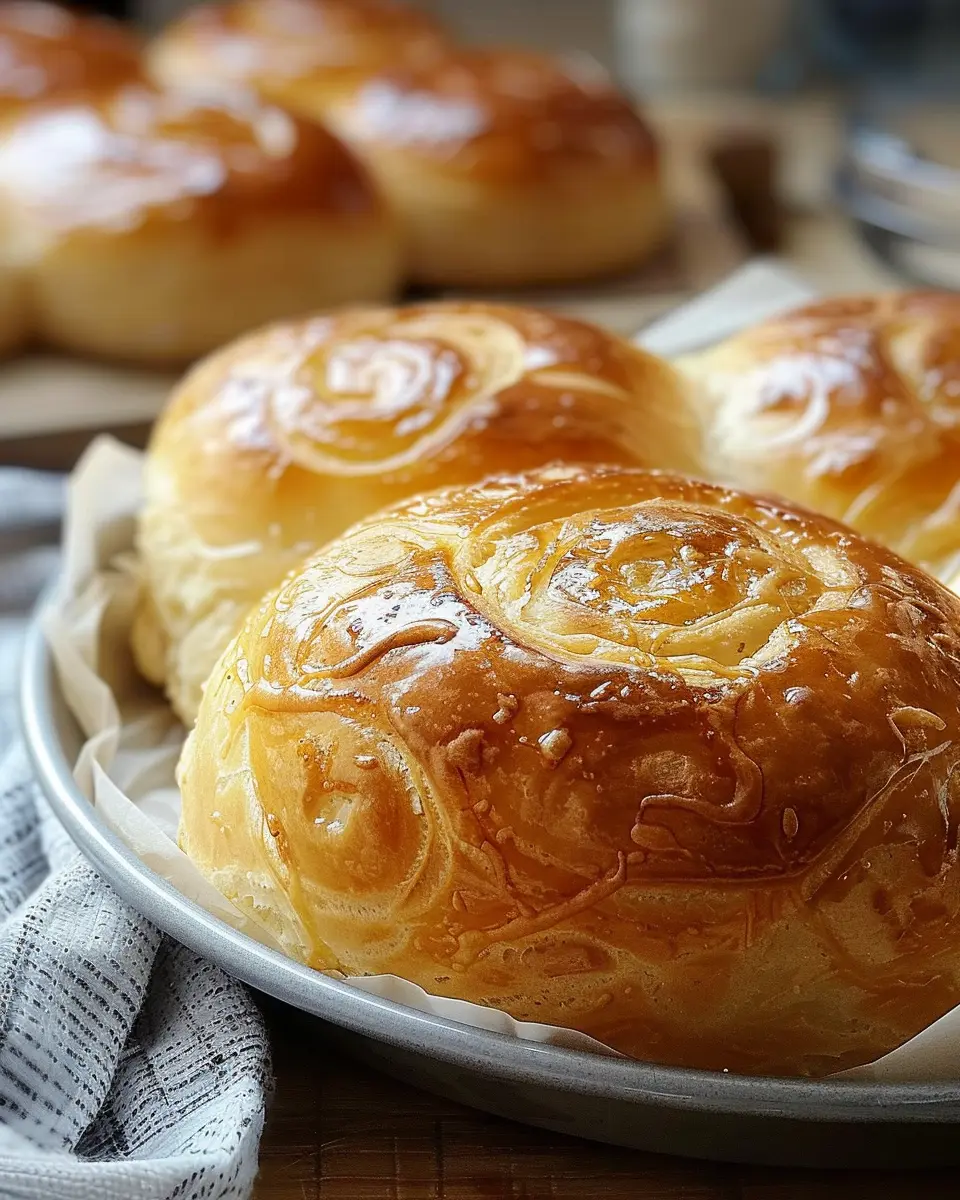
Bake for about 15-20 minutes, or until they’re golden brown. The heavenly aroma is about to fill your kitchen! After baking, let them cool slightly before topping with butter and quezo de bola (grated cheese) for that authentic finish.
Before you know it, you’ll have a batch of classic ensaymada bread that’s perfect for sharing—or, let’s be honest, enjoying all by yourself!
For more tips and tricks on baking breads, check out King Arthur Baking for reliable resources and inspiring recipes. Happy baking!
Variations on Classic Ensaymada Bread
Ensaymada bread is such a versatile treat, and there’s no limit to the delicious ways you can enjoy it. Whether you’re leaning towards something sweet or feeling adventurous with savory flavors, these variations will take your classic ensaymada bread experience to the next level.
Sweet Variations
For those with a sweet tooth, you can play around with fillings and toppings:
- Cheese and Sweet Butter: The classic version topped with cream cheese icing is a crowd-pleaser. Add a sprinkle of powdered sugar for extra sweetness.
- Ube Flavor: Infuse the dough with ube extract or simply add ube halaya (purple yam jam) for that vibrant color and rich taste.
- Chocolate Hazelnut: Spread chocolate hazelnut spread in the center before rolling up your dough. Top it with crushed hazelnuts for a delightful crunch.
- Cinnamon Sugar: Enhance your dough with a sprinkle of cinnamon before rolling. It adds a warm, inviting aroma that’s hard to resist.
These sweet options can turn a simple classic ensaymada bread into a showstopper for gatherings or a comforting treat for yourself.
Savory Variations
If you’re more inclined towards savory delights, ensaymada bread can easily accommodate those flavors too:
- Chicken Ham and Cheese: Layer slices of chicken ham and your favorite cheese inside the dough before rolling. The melted cheese creates a gooey, delightful treat.
- Turkey Bacon and Egg: For a brunch favorite, add scrambled eggs and crispy turkey bacon. This is breakfast and pastry all in one!
- Spinach and Feta: Roll up a mixture of sautéed spinach and crumbled feta cheese for a Mediterranean twist that’s light yet satisfying.
Whichever variation you choose, the base of your classic ensaymada bread remains wonderfully fluffy and rich. Get inspired by these options, and don’t hesitate to experiment with your own favorite fillings! Whether you’re indulging yourself or sharing with friends, these variations are sure to delight. For more inspiration, check out resources like Serious Eats for additional ideas on tweaking classic recipes.
Cooking Tips and Notes for Classic Ensaymada Bread
Common Pitfalls
Making classic ensaymada bread can be an exhilarating experience, but it also comes with a few common hiccups. One of the main mistakes is over proofing the dough. If your dough rises too much, it could end up dense instead of fluffy. Always keep an eye on your dough and trust your senses—look for a soft, pillowy texture.
Another issue is inconsistencies with the cheese topping. While a mixture of cheddar and queso de bola adds depth, be cautious with the saltiness of your cheese. A little taste test can go a long way in ensuring a perfectly balanced flavor!
Ingredient Tips
Quality ingredients are key to perfecting your classic ensaymada bread. For the flour, opt for bread flour for its higher protein content, which can yield a nice chewy texture. You can also substitute with whole wheat flour for a healthier option.
When it comes to butter, always choose unsalted. This allows you to control the salt levels in both the dough and the toppings, enhancing the overall experience. Consider pairing with fresh fruit preserves, honey, or even a splash of milk for your baking endeavors.
For an expert guide on baking bread, consider checking out this bread baking resource to tailor your approach further. Happy baking!
Serving suggestions for Classic Ensaymada Bread
Pairing with Drinks
When it comes to enjoying your classic ensaymada bread, consider delightful drink pairings to enhance the flavors! A warm cup of coffee is an obvious choice, as the richness of the bread pairs beautifully with the bold notes of a freshly brewed cup. For a lighter option, a refreshing glass of iced tea or cold brew complements the sweetness perfectly. Looking for something a bit different? Try pairing it with hot chocolate on chilly days for a comforting treat.
Ideal Occasions
The versatility of classic ensaymada bread makes it perfect for various occasions. Whether you’re hosting a cozy brunch with friends or celebrating a birthday, these fluffy treats will impress your guests. They also shine at holiday gatherings, adding a festive touch. Planning a casual get-together? Serve them as a delightful snack that pairs well with savory bites like turkey bacon or chicken ham.
For more enjoyable serving ideas, check out resources like Bon Appétit or Serious Eats for inspiration!
Time breakdown for Classic Ensaymada Bread
Planning your baking can make a world of difference, especially when you’re preparing to whip up something as delightful as classic ensaymada bread. Here’s how your time will be divided:
Preparation time
The preparation for these soft and fluffy rolls takes about 30 to 45 minutes. This includes mixing the ingredients, kneading the dough, and letting it rise. Remember, patience is key, but the aroma will keep you excited!
Baking time
Once your dough is ready, the baking process itself is fairly quick, taking about 15 to 20 minutes. You’ll want to keep an eye on them, though; the golden-brown tops are what make these rolls so irresistible!
Total time
In total, you’re looking at around 2 to 3 hours from start to finish—most of which is waiting for the dough to rise. For a detailed guide, you can explore resources like King Arthur Baking or Serious Eats. Grab your apron, and enjoy the process of making this wonderful classic ensaymada bread!
Nutritional facts for Classic Ensaymada Bread
Caloric content
When you’re indulging in classic ensaymada bread, you might be curious about what’s on the nutritional label. A typical serving contains around 200-250 calories, depending on ingredients and portion size. It’s important to balance this treat within your daily caloric intake, especially if you’re keeping an eye on your nutrition.
Key nutrients
This delightful pastry isn’t just about calories; it also packs essential nutrients you might appreciate:
- Carbohydrates: Great for a quick energy boost
- Protein: Helps with muscle repair and satiety
- Fats: Often from butter or cream cheese, these add to the rich flavor and texture
For further detailed information, check out the USDA’s FoodData Central for a comprehensive breakdown. Enjoy your ensaymada with a side of fresh fruit or a light beverage to make a wholesome snack!
FAQ about Classic Ensaymada Bread
Can I freeze ensaymada?
Absolutely! Freezing your classic ensaymada bread is a great way to enjoy it later. Once it’s completely cooled, wrap each piece tightly in plastic wrap or aluminum foil, then place them in a freezer-safe bag. When you’re ready to indulge, simply thaw at room temperature or pop them straight into the oven for a few minutes to regain that freshly baked texture. According to the USDA, frozen bread can last up to three months, so don’t hesitate to prepare a batch for future cravings!
How do I store leftover bread?
To keep your classic ensaymada bread fresh, store it in an airtight container at room temperature. Avoid refrigerating it, as this can dry it out faster. If you anticipate not finishing the bread within a couple of days, consider freezing it as mentioned above. For best results, enjoy within 3-5 days for maximum flavor and softness.
What can I substitute for yeast?
If you find yourself without yeast, don’t worry! You can use baking soda and vinegar as an alternative. For every cup of flour, replace one teaspoon of yeast with 1/4 teaspoon of baking soda and 1 tablespoon of vinegar. This combination produces carbon dioxide, helping your classic ensaymada bread rise. Do keep in mind that the flavor and texture may vary slightly.
Feel free to explore alternatives and get creative in the kitchen! If you’re curious about baking tips or exploring more bread recipes, check out resources like King Arthur Baking for guidance. Happy baking!
Conclusion on Classic Ensaymada Bread
Final thoughts on making ensaymada at home
Making classic ensaymada bread at home is not just a culinary project; it’s a delightful journey filled with creativity and delicious rewards. The process may seem daunting at first, but the result is well worth it. Each soft, buttery bite transports you to a cozy café, making you forget all the effort that went into it.
Remember, practice makes perfect! Don’t hesitate to experiment with different toppings or fillings—try adding some Turkey Bacon or even a sweet twist with fruits. As you master this recipe, you’ll find comfort in knowing you’ve created something truly special for your loved ones.
For an extra touch of authenticity, consider pairing your ensaymada with a cup of local coffee or a sweet milo drink. Not only will it elevate your experience, but it will also provide a wonderful opportunity for sharing your culinary creation with friends and family—a true feast for the senses!
Ready to start your ensaymada journey? Your baking adventure awaits!
PrintClassic Ensaymada Bread: The Best Ultimate Recipe for Home Bakers
Discover the ultimate recipe for Classic Ensaymada Bread, a deliciously fluffy and buttery treat that is perfect for any occasion.
- Prep Time: 45 minutes
- Cook Time: 25 minutes
- Total Time: 2 hours 10 minutes
- Yield: 12 pieces 1x
- Category: Dessert
- Method: Baking
- Cuisine: Filipino
Ingredients
- 4 cups all-purpose flour
- 1 cup warm milk
- 1/2 cup sugar
- 1/2 cup unsalted butter, softened
- 2 large eggs
- 2 teaspoons instant yeast
- 1/2 teaspoon salt
- 1 cup grated cheese (for topping)
Instructions
- In a bowl, combine warm milk, sugar, and yeast. Let it sit until foamy.
- In another bowl, mix flour and salt. Add the yeast mixture, eggs, and butter. Knead until smooth.
- Let the dough rise in a warm place for 1-2 hours until doubled in size.
- Punch down the dough and divide it into small balls. Shape each ball into a coil and place on a baking sheet.
- Allow the shaped dough to rise again for 30 minutes.
- Bake at 350°F (175°C) for about 20-25 minutes or until golden brown.
- Top with grated cheese while warm.
Notes
- For a sweeter version, add more sugar and top with a mixture of sugar and cheese.
- Ensure your milk is warm, not hot, to activate the yeast properly.
Nutrition
- Serving Size: 1 piece
- Calories: 250
- Sugar: 10g
- Sodium: 200mg
- Fat: 15g
- Saturated Fat: 8g
- Unsaturated Fat: 5g
- Trans Fat: 0g
- Carbohydrates: 30g
- Fiber: 1g
- Protein: 4g
- Cholesterol: 60mg
Keywords: Classic Ensaymada Bread, Ensaymada recipe, homemade Ensaymada