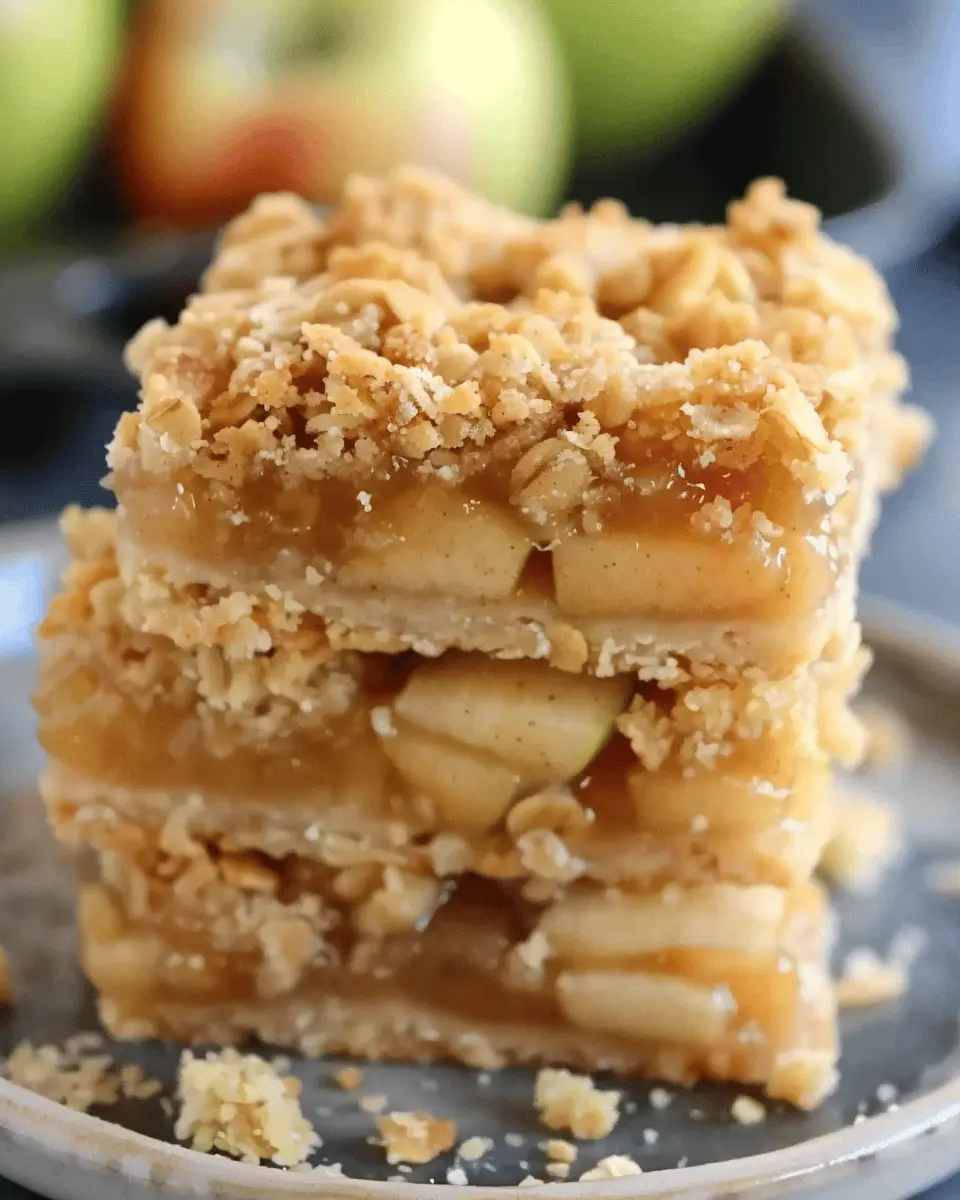
Introduction to Apple Crisp Bars
If you’re a young professional constantly juggling deadlines, social commitments, and the occasional Netflix binge, finding time for elaborate desserts may feel impossible. Enter apple crisp bars—the perfect sweet treat that combines simplicity with scrumptiousness, making your life just a bit sweeter. In this busy age, dessert should be both delightful and straightforward, and that’s exactly what these bars deliver!
Why Apple Crisp Bars are the Perfect Dessert for Young Professionals
Imagine this: It’s Sunday evening, and you want to wind down with a little something sweet after an intense week. Instead of spending hours baking, you can whip up a batch of apple crisp bars in under an hour. With a minimal ingredient list, these bars offer a lovely combination of tender apples and a crunchy topping that’s sure to impress friends, family, or even just yourself. Plus, they’re an ideal way to use up any apples you have lingering in your fridge.
Here’s why these bars might just become your go-to dessert:
-
Easy Preparation: Even if you’re not a baking whiz, you can master this recipe. It requires just a handful of ingredients and straightforward steps. No complicated techniques here!
-
Versatile Serving Options: Whether you want to serve them warm with a scoop of vanilla ice cream or enjoy them cold with your morning coffee, these bars are adaptable to any occasion. Need a work-from-home snack? These are perfect for that, too!
-
Healthier Indulgence: While they are undoubtedly a treat, you can choose options like lowering the sugar or adding oats for a nutritious boost. The flavors of the apples shine through, making them a more wholesome dessert option.
-
Impressive Results: Serve these apple crisp bars at your next gathering, and your friends will think you spent hours in the kitchen. And who doesn’t love a recipe that can elicit compliments without the fuss?
For more baking inspiration, check out sites like Food52 or Serious Eats. Trust me; you’ll find plenty of delightful ideas that align beautifully with a young professional lifestyle.
So grab those apples, and let’s get baking! Your future sweet-toothed self will thank you.

Ingredients for Apple Crisp Bars
When it comes to whipping up some delightful apple crisp bars, having the right ingredients is key. Let’s break down what you’ll need for this delicious dessert that’s perfect for any occasion.
Essential Ingredients for the Base
To craft a sturdy base for your apple crisp bars, gather these staples:
- Butter: 1 cup, softened for that rich flavor.
- Brown sugar: 1 cup, for sweetness and moisture.
- All-purpose flour: 2 cups, to keep everything together.
- Oats: 1 cup rolled oats, adding that lovely chewiness.
These ingredients create a buttery foundation that balances beautifully with the fruity filling and crispy topping.
Delish Filling with Apples and Spices
No apple crisp bars would be complete without a flavorful filling! For this layer, you’ll need:
- Apples: About 4 cups, peeled and sliced for that perfect texture. Honeycrisp or Granny Smith work wonderfully.
- Sugar: 1/2 cup, to enhance the apple sweetness.
- Cinnamon: 1 teaspoon, for that warm, comforting flavor.
- Nutmeg: A dash is optional, but it adds an aromatic twist.
These ingredients create a nostalgic taste that everyone craves, making each bite irresistible.
Topping Ingredients for Ultimate Crispness
The secret to that ultimate crispiness lies in the topping. You’ll want to include:
- Brown sugar: 3/4 cup, for a sweet crunch.
- Flour: 1 cup, to help bind it all together.
- Oats: 1/2 cup, enhancing the chew and texture.
- Cinnamon: Another sprinkle for good measure.
- Butter: 1/2 cup, melted, to bring it all to life.
Mix these ingredients together until crumbly, then sprinkle generously over your apple filling. The result? A golden, crispy layer that complements the sweet, cinnamon-spiced apples beneath.
With these apple crisp bars ingredients on hand, you’ll be well on your way to creating a dessert that friends and family will love! Think about what brings you joy—this dessert is sure to bring back fond memories of shared meals and laughter. For more ingredient tips, check out Food Network or BBC Good Food. Happy baking!
Preparing Apple Crisp Bars
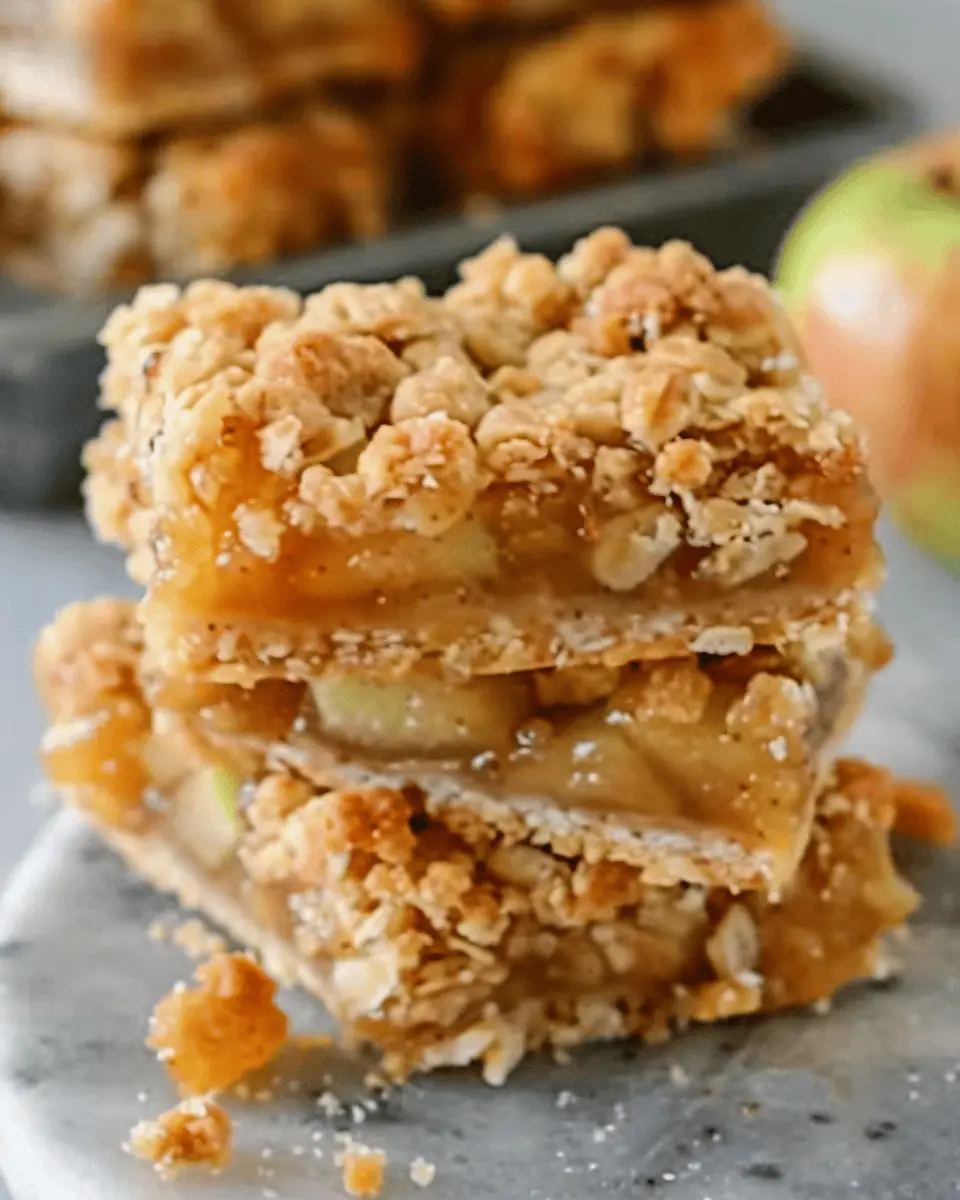
When it comes to comfort food, few desserts can compete with the warm, inviting aroma of apple crisp bars. The delightful combination of sweet apples, buttery crust, and a crumbly topping not only satisfies your sweet tooth but also evokes a sense of nostalgia that’s hard to resist. Let’s dive into how you can prepare these delicious bars in just a few easy steps.
Preheat and Prepare the Baking Dish
Before you start mixing and chopping, preheating your oven is crucial for achieving that perfect, golden-brown finish. Set your oven to 350°F (175°C) and let it warm up while you prepare your ingredients.
For the baking dish, a 9×13 inch pan works wonders for these apple crisp bars. Grease the bottom and sides with butter or line it with parchment paper for easy removal later. If you choose parchment, leave some overhang, and it’ll make lifting the bars out a breeze once they are baked.
Make the Shortbread Base
Now, let’s create that delicious shortbread base—this is the layer that sets the foundation for our bars. In a mixing bowl, combine:
- 1 cup of softened unsalted butter
- 1/2 cup of sugar
- 2 cups of all-purpose flour
- 1/4 teaspoon of salt
Using your hands or a pastry cutter, blend the ingredients until the dough resembles coarse crumbs. When you press it together, it should hold its shape. Pour this mixture into your prepared dish and spread it evenly, pressing down to create a compact base. Bake this at 350°F for about 20 minutes or until it’s lightly golden.
Prepare the Apple Filling
While that’s baking, let’s focus on the star of the show: the apples. Use around six medium-sized apples, preferably a mix of sweet and tart varieties like Granny Smith and Honeycrisp for the best flavor.
- Peel, core, and slice your apples thinly.
- In a bowl, toss the slices with:
- 1/4 cup of sugar
- 2 tablespoons of lemon juice
- 1 teaspoon of cinnamon
- 1/4 teaspoon of nutmeg
This step adds a lovely zing to the apples. For a guide on selecting the best apples, check out this helpful article on apple varieties. Let this mixture sit for about 10-15 minutes while the juices mingle.
Create the Streusel Topping
As your apple crisp bars are coming together, it’s time to work on that crunchy streusel topping. In a clean bowl, mix together:
- 1 cup of rolled oats
- 1/2 cup of all-purpose flour
- 1/2 cup of packed brown sugar
- 1/2 cup of cold, diced butter
- 1 teaspoon of cinnamon
Using a fork or your fingers, combine until the mixture looks crumbly. You want it to maintain some larger chunks for that satisfying crunch.
Assemble and Bake the Apple Crisp Bars
Now, let’s bring all the elements together! Once your shortbread base is baked, remove it from the oven and let it cool for a few minutes. Then spread the apple mixture evenly over the warm crust. Finally, sprinkle your streusel topping generously on top of the apples.
Pop the entire dish back into the oven and bake for an additional 30-35 minutes, until the topping is golden brown and the apples are bubbling. Once baked, let those apple crisp bars cool for at least 15 minutes before slicing into squares. This cooling step helps everything set up beautifully.
And there you have it—delicious, homemade apple crisp bars that are sure to impress. Whether served warm with a scoop of vanilla ice cream or as an irresistible snack throughout the week, these bars are a delightful treat for any occasion. Enjoy!
Variations on Apple Crisp Bars
Gluten-Free Apple Crisp Bars
If you or someone you know is gluten-sensitive, fear not! Making apple crisp bars gluten-free is easier than you think. Simply substitute your regular flour with almond flour or a gluten-free all-purpose blend. These options not only keep your bars safe for those with dietary restrictions, but they also add a delightful nutty flavor and extra moisture to the crumb topping. Just make sure to check the labels on your oats to ensure they’re certified gluten-free!
Apple Crisp Bars with Ice Cream
Who can resist the creamy goodness of ice cream pairing with warm apple crisp bars? For a classic treat, top your bars with a generous scoop of vanilla bean ice cream. The combination of warm apples and cool, creamy ice cream creates a comforting dessert that’s perfect for any celebration (or a cozy night in!). If you’re feeling adventurous, try flavors like cinnamon or caramel swirl for that extra touch of indulgence.
Cinnamon Roll Apple Crisp Bars
For a fun twist, you can transform your regular apple crisp bars into cinnamon roll apple crisp bars! Simply incorporate cinnamon roll dough into your topping. You can either use store-bought dough or make your own. Cut the dough into small pieces and scatter it over the apple filling before baking. Imagine biting into a sweet cinnamon roll mingled with soft, spiced apples—pure bliss!
Pro tip: No matter which variation you choose, these bars are perfect for sharing (or keeping all to yourself). Consider serving them with coffee at your next brunch gathering. Your guests will be raving about them!
Cooking Tips and Notes for Apple Crisp Bars
Best apples for the filling
Choosing the right apples makes all the difference in your apple crisp bars. Look for a blend of sweet and tart varieties. Some great options include:
- Granny Smith: Provides nice tartness.
- Honeycrisp: Known for its sweetness and crisp texture.
- Fuji: Offers a good balance of sweetness and firmness.
Mix these for a more complex flavor profile!
How to store your apple crisp bars
To keep your apple crisp bars fresh, store them in an airtight container. Place a piece of parchment paper between layers if stacking. They’ll last up to 4 days in the fridge. For longer storage, consider freezing them; simply wrap in plastic wrap and aluminum foil.
Reheating tips for maximum crispiness
When you’re ready to eat, preheat your oven to 350°F (175°C). Place the bars on a baking sheet for about 10-15 minutes. This helps the topping regain its delightful crunch, ensuring each bite is as delicious as the first. You can also try using an air fryer for a quick and crispy reheat.
For more tips on baking with apples, check out resources like The Spruce Eats for expert advice. Happy baking!
Serving Suggestions for Apple Crisp Bars
Pairing with Toppings like Whipped Cream
When serving your apple crisp bars, consider adding a dollop of freshly whipped cream on top. This not only enhances the delightful flavors but also adds a creamy contrast to the warm, spiced apple filling. For an extra twist, you might drizzle some caramel sauce over the whipped cream for that indulgent touch.
Not a fan of whipped cream? Try serving your bars with a scoop of vanilla ice cream. There’s something magical about the warm, gooey goodness of the bars paired with ice cream melting over them. If you’re feeling adventurous, a sprinkle of sea salt can elevate that sweet-salty flavor profile!
Creative Serving Ideas for Gatherings
Hosting a gathering? Apple crisp bars make for the perfect dessert to impress your guests!
- Charming Dessert Platter: Cut the bars into bite-sized squares and arrange them on a platter. Add some fresh apple slices and a few sprigs of mint for color.
- Mini Parfaits: Layer crumbled apple crisp bars with yogurt and a drizzle of honey in small glasses for a fun, individual treat.
- Themed Events: If you’re throwing a fall-inspired gathering, incorporate spices like cinnamon and nutmeg into the presentation, aligning with the cozy, seasonal vibes.
These creative touches can be both delicious and visually appealing, ensuring your dessert is the highlight of the evening! For more ideas on dessert presentation, check out The Spruce Eats.
Time Breakdown for Apple Crisp Bars
Preparation Time
Getting started on your apple crisp bars is a breeze! You’ll need about 15 minutes to gather your ingredients and prep the apples. If you’re using fresh apples, don’t forget to wash and slice them to perfection. This step is crucial to ensure your bars are juicy and flavorful.
Cooking Time
Once your mixture is prepped, it’s time to bake! Set your oven to 350°F (175°C) and let those bars cook for around 25-30 minutes. You’ll want that enticing golden-brown topping to signal that your dessert is almost ready.
Total Time from Start to Serve
In total, you’re looking at an easy 45-50 minutes from start to your delightful apple crisp bars. This quick recipe will have your kitchen filled with mouthwatering aromas in no time. Who wouldn’t want a slice of these delicious treats after such a short wait?
For more tips on baking and ingredient selection, check out the American Baking Guild for insider advice!
Nutritional Facts for Apple Crisp Bars
Calories per serving
With just around 180 calories per serving, these apple crisp bars are a delightful treat that won’t break your calorie bank. They make for a satisfying dessert while still allowing you to indulge your sweet tooth. It’s a great option for young professionals looking for a balance between enjoying tasty food and maintaining a nutritious lifestyle.
Key nutrients and health tips
These apple crisp bars pack a punch in nutritional value. Key nutrients include:
- Fiber: The oats and apples contribute to your daily fiber intake, which is essential for digestive health.
- Vitamins: Apples are rich in vitamin C, contributing to your immune function and skin health.
- Antioxidants: The combination of apples and cinnamon provides a host of antioxidants that are beneficial for overall health.
For added health benefits, consider using whole-grain oats and lowering the sugar content a bit. By incorporating these tweaks, you’re not just treating yourself; you’re also nourishing your body.
Curious about more nutritious dessert ideas? Check out sources like the Harvard Health Blog for tips on maintaining a balanced diet while still enjoying delicious treats!
FAQ about Apple Crisp Bars
How do I know when my apple crisp bars are done?
Determining the perfect doneness for apple crisp bars is key to achieving that delightful texture. You’ll want to look for a golden brown top, which usually takes about 30-35 minutes in the oven. A gentle poke with a toothpick can also help; if it comes out clean or with just a few crumbs clinging to it, your bars are ready to come out. Let them cool for at least 15 minutes before slicing—that’ll help them hold their shape!
Can I use frozen apples for this recipe?
Absolutely! Frozen apples are a great option, especially if you’re craving apple crisp bars out of season. Just be sure to thaw them first and drain any excess moisture. This will prevent your bars from becoming soggy. Some people even prefer frozen apples for their convenience and flavor. For detailed tips on using frozen fruit, check out resources from Food Network.
What’s the best way to cut apple crisp bars?
Cutting apple crisp bars can be a bit tricky if they’re still warm. For the best results:
- Cool down: Allow the bars to cool completely.
- Use a sharp knife: A sharp knife will give you cleaner cuts without crumbling.
- Warm the knife: Briefly dipping the knife in hot water and wiping it dry can make slicing easier.
If you follow these steps, you’ll not only get perfect portions, but your bars will also look irresistible on your dessert platter. Happy baking!
Conclusion on Apple Crisp Bars
Recap the joy of homemade apple crisp bars
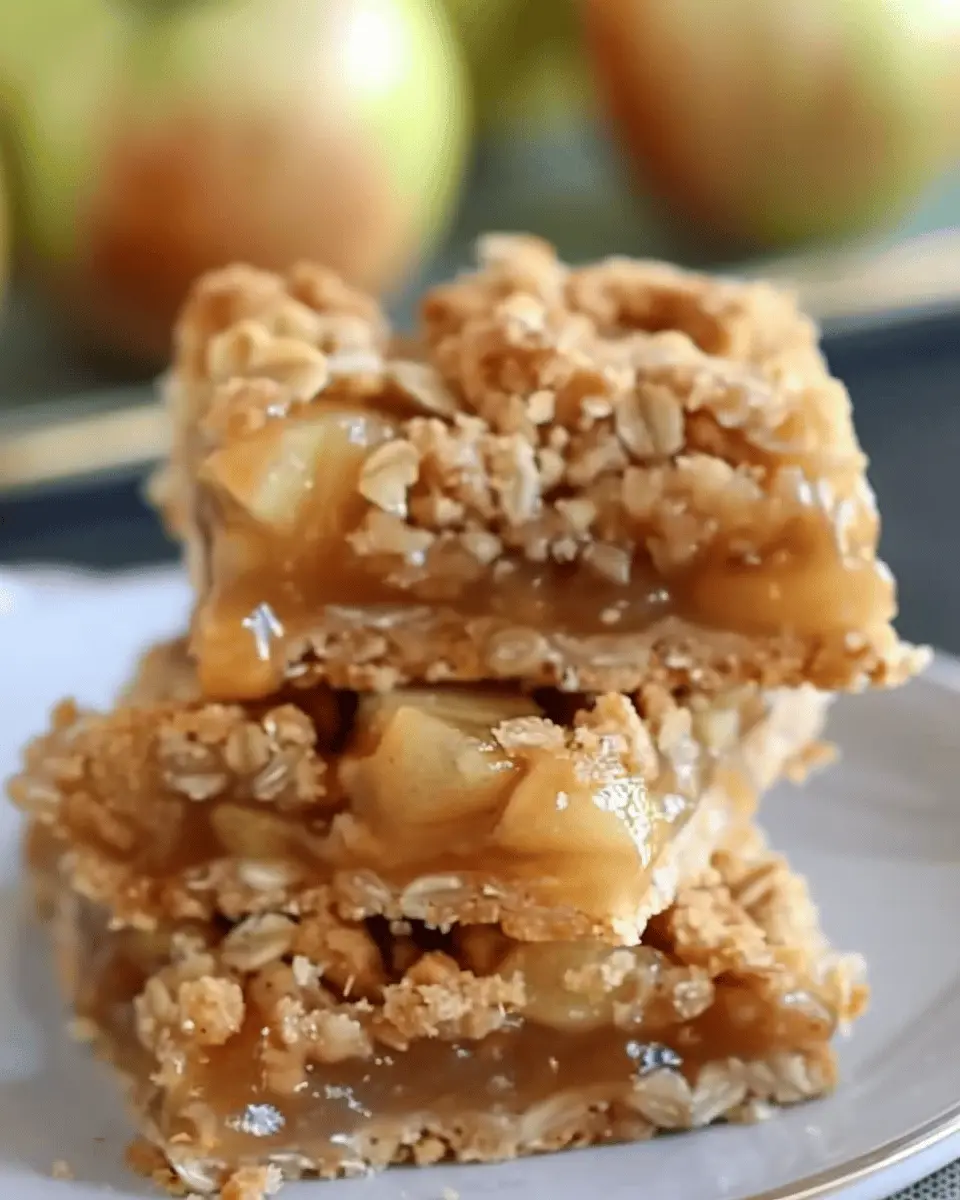
Creating homemade apple crisp bars is truly a delightful experience. The combination of sweet, tender apples with a crumbly topping is simply irresistible. You get to enjoy a comforting treat that feels homemade and heartfelt. Plus, the aroma wafting through your kitchen as they bake is enough to brighten anyone’s day.
Whether you’re sharing these bars with friends during a casual gathering or savoring them solo with a cup of coffee, they evoke a sense of nostalgia and warmth. So, grab your ingredients and start baking—you’ll be amazed at how easy it is to whip up a batch of these delightful treats.
Want to explore more about the benefits of baking at home? Check out this insightful article on the science of baking. Happy baking!
PrintApple Crisp Bars with Crumb Topping: The Best Homemade Treat
Enjoy the delicious flavors of homemade apple crisp with these easy-to-make Apple Crisp Bars. Perfect for any occasion!
- Prep Time: 15 minutes
- Cook Time: 35 minutes
- Total Time: 50 minutes
- Yield: 16 bars 1x
- Category: Desserts
- Method: Baking
- Cuisine: American
- Diet: Vegetarian
Ingredients
- 4 cups sliced apples
- 1 cup brown sugar
- 1 cup all-purpose flour
- 1 cup rolled oats
- 1/2 cup unsalted butter, melted
- 1 teaspoon cinnamon
- 1/2 teaspoon nutmeg
- 1/4 teaspoon salt
Instructions
- Preheat the oven to 350°F (175°C).
- In a mixing bowl, combine melted butter, brown sugar, flour, oats, cinnamon, nutmeg, and salt.
- Press half of the mixture into a greased baking pan.
- Layer the sliced apples on top of the crust.
- Sprinkle the remaining crumb mixture over the apples.
- Bake for 30-35 minutes until golden brown.
- Let cool before cutting into bars.
Notes
- Use tart apples for the best flavor.
- These bars can be served warm or at room temperature.
Nutrition
- Serving Size: 1 bar
- Calories: 180
- Sugar: 12g
- Sodium: 100mg
- Fat: 7g
- Saturated Fat: 4g
- Unsaturated Fat: 2g
- Trans Fat: 0g
- Carbohydrates: 25g
- Fiber: 2g
- Protein: 2g
- Cholesterol: 15mg
Keywords: Apple Crisp Bars, Crumb Topping, Homemade Treat