The Magic of Stained Glass Cookies
Have you ever gazed at a beautifully crafted stained glass window, mesmerized by the play of colors? Now, imagine bringing that enchantment into your kitchen with stained glass Christmas cookies. These delightful treats not only capture the essence of holiday cheer but also provide a fun and creative activity for both individuals and families alike.
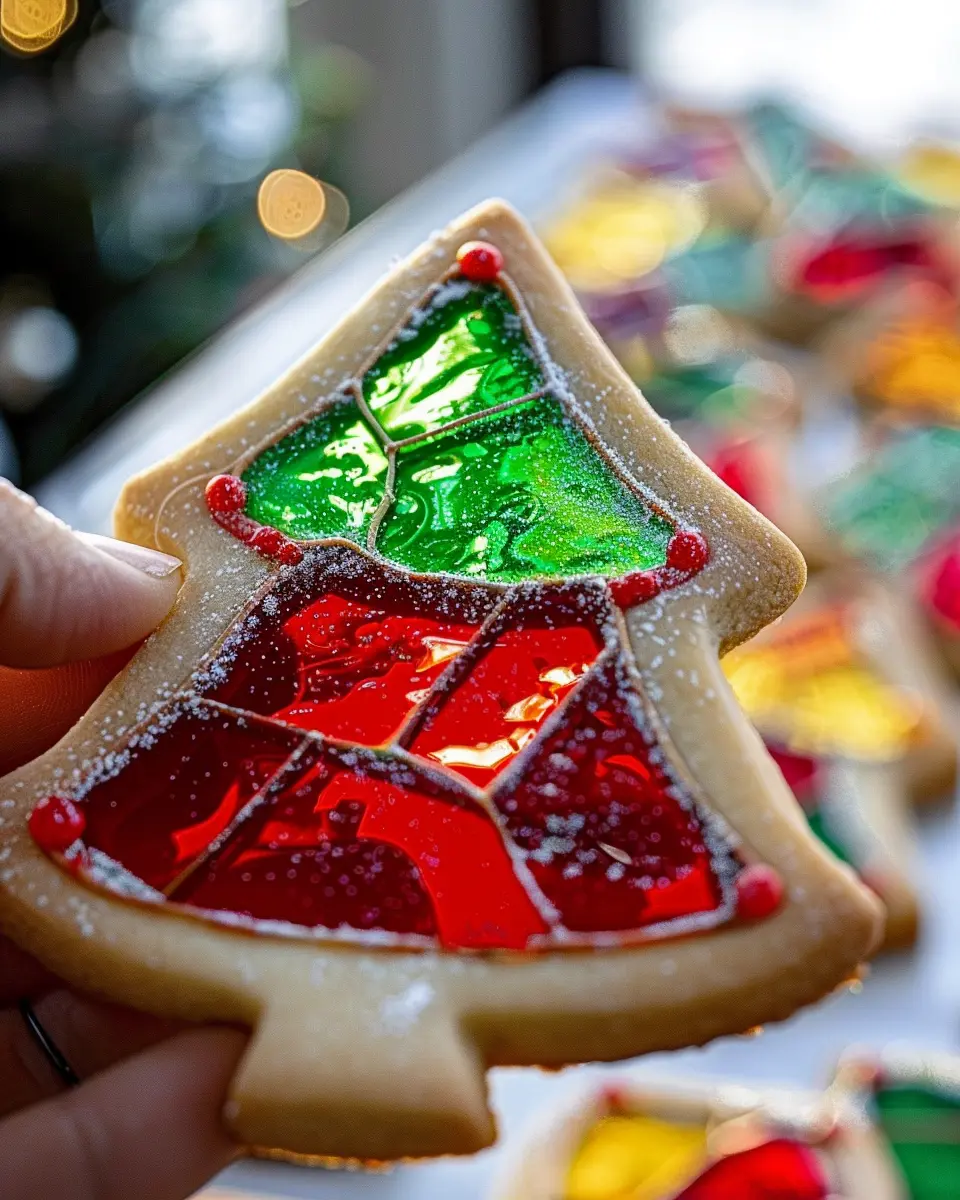
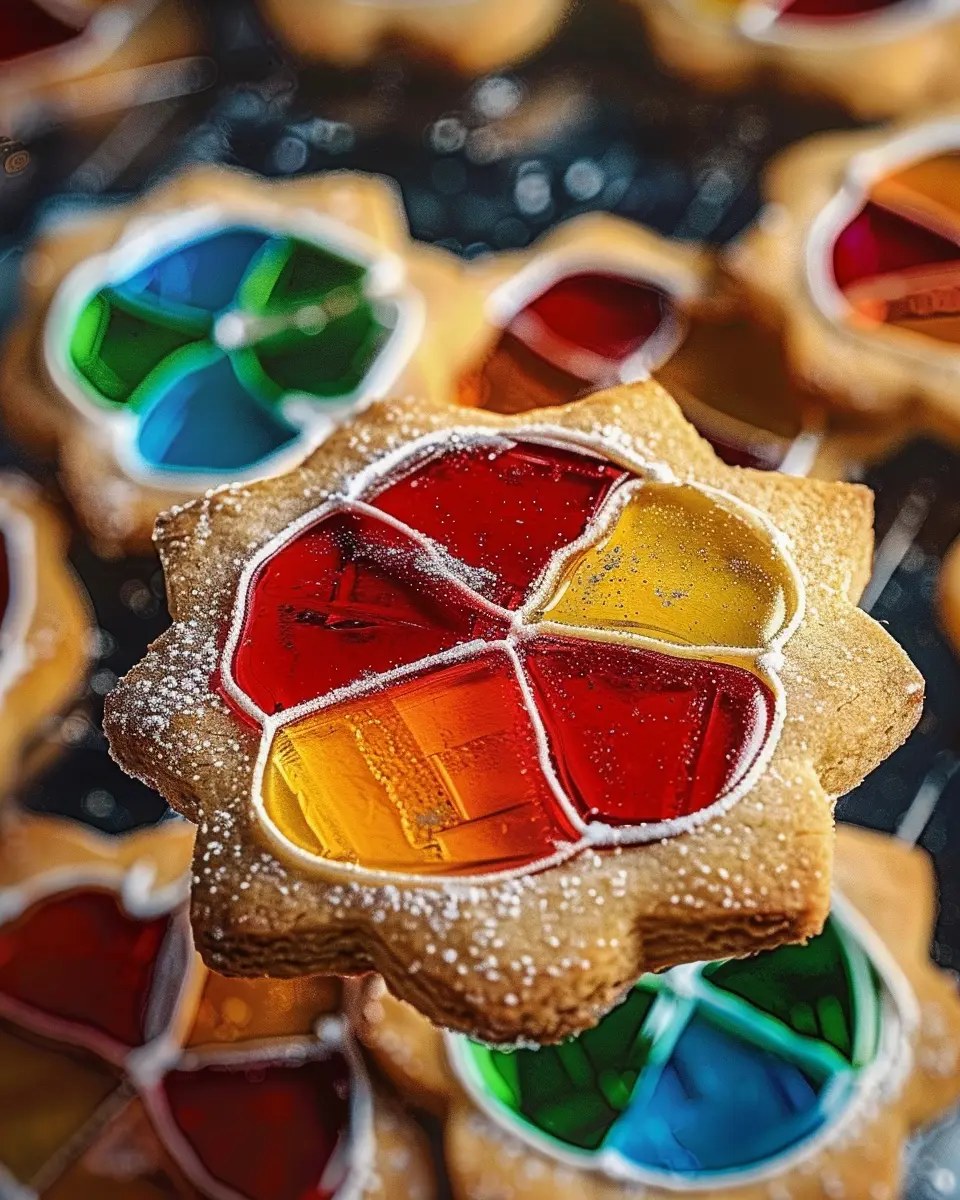
Stained glass cookies are typically made with a standard sugar cookie dough, but what sets them apart is the addition of colorful hard candies. When baked, these candies melt within the cookie, creating a stunning transparent effect that resembles stained glass. Not only do they look impressive, but the combination of flavors and textures makes every bite an experience to savor.
To make your cookie-making adventure even more enjoyable, consider playing your favorite holiday music or inviting friends over for a cookie-decorating party. Sharing culinary experiences can build memories that last a lifetime—after all, who doesn’t love decorating together and indulging in sweet treats? Check out Delish’s guide on holiday baking for other festive ideas to spice up your gatherings.
When it comes to stained glass Christmas cookies, the creativity doesn’t stop at the dough and candies. Here are a few ideas to elevate your cookie game:
- Choose a variety of hard candies: Get creative with colors and flavors. You can use classic candy canes for a peppermint twist or vibrant gummy treats that will pop against the cookie dough.
- Shape matters: Use cookie cutters in various holiday shapes like stars, trees, or snowflakes to give each cookie a unique flair. Children will especially enjoy this part of the process!
- Decorate with icing: Finish your cookies with royal icing or sprinkle them with edible glitter for a festive sparkle.
So roll up your sleeves, gather your ingredients, and get ready to create these festive, edible works of art that are sure to brighten any holiday celebration. After indulging in the creation of stained glass Christmas cookies, you’ll find yourself filled with holiday spirit and perhaps even a desire to share these cheerful goodies with neighbors and friends!
Ingredients for Stained Glass Christmas Cookies
Creating the perfect stained glass Christmas cookies is not only about the delightful visuals but also about the deliciousness of the cookie itself. Let’s break down what you’ll need to bring these festive treats to life.
Essential Ingredients for the Cookie Dough
For the cookie base, you’ll need:
- 2 ¾ cups of all-purpose flour – This provides the structure.
- 1 teaspoon of baking powder – For a little lift.
- ¼ teaspoon of salt – To enhance flavor.
- 1 cup of unsalted butter, softened – A must for the rich flavor.
- 1 cup of granulated sugar – For that sweetness.
- 1 large egg – It binds everything together.
- 2 teaspoons of vanilla extract – Because who doesn’t love vanilla?
These basic ingredients set the stage for a delightful cookie.
Ingredients for the Stained Glass Centers
To create the beautiful stained glass effect, stock up on:
- Hard candies (like Jolly Ranchers or Life Savers) – Choose an assortment of colors for vibrancy.
- A rolling pin – If you don’t have one, a wine bottle can do the trick!
This part is where your creativity shines.
Ingredients for the Buttercream Frosting
For a perfect finishing touch on your stained glass Christmas cookies, gather:
- 1 cup of unsalted butter, softened – Always the base of great frosting.
- 4 cups of powdered sugar – Sweetness is key.
- 2-3 tablespoons of milk – To achieve the right consistency.
- 1 teaspoon of vanilla extract – To enhance that sweet flavor.
These ingredients combine to create a creamy, luscious frosting that will make your cookies irresistible!
Whether you’re making these treats for a holiday gathering or just to enjoy at home, the process is truly rewarding. Ready to dive into the mixing and baking? Let’s get started!
Step-by-Step Preparation of Stained Glass Christmas Cookies
Creating stained glass Christmas cookies is a delightful way to get into the festive spirit. Not only are they visually appealing, but they also taste fantastic! Whether you’re preparing for a holiday gathering or just baking for fun, follow this simple guide to make your own stunning cookies.
Preparing the Cookies
Before diving into the dough, gather all your ingredients. For this recipe, you’ll need:
- 2 and 3/4 cups all-purpose flour
- 1 cup unsalted butter, softened
- 1 cup granulated sugar
- 1 egg
- 1 teaspoon vanilla extract
- 1/2 teaspoon baking powder
- 1/2 teaspoon salt
- Colorful hard candies (such as Jolly Ranchers) for the stained glass effect
The first step is to make sure your butter is soft enough to cream with the sugar easily. This will give your cookies the perfect texture. Remember, using room temperature butter is key to achieving that dreamy, melt-in-your-mouth taste!
Mixing the Cookie Dough
In a large mixing bowl, cream together the softened butter and granulated sugar until the mixture is light and fluffy. This usually takes about 3-5 minutes. Add the egg and vanilla extract, mixing until well combined. In another bowl, whisk together the flour, baking powder, and salt, ensuring even distribution.
Gradually add the dry ingredients into the wet mixture. To avoid a flour cloud explosion in your kitchen, mix at a low speed until fully combined. Your dough will become quite thick—a sign that you’re on the right track!
Chilling and Cutting the Dough
This step is crucial for the best stained glass Christmas cookies. Once your dough is ready, wrap it in plastic wrap and refrigerate for at least 1 hour. Chilling prevents the cookies from spreading too much while baking, maintaining that lovely shape.
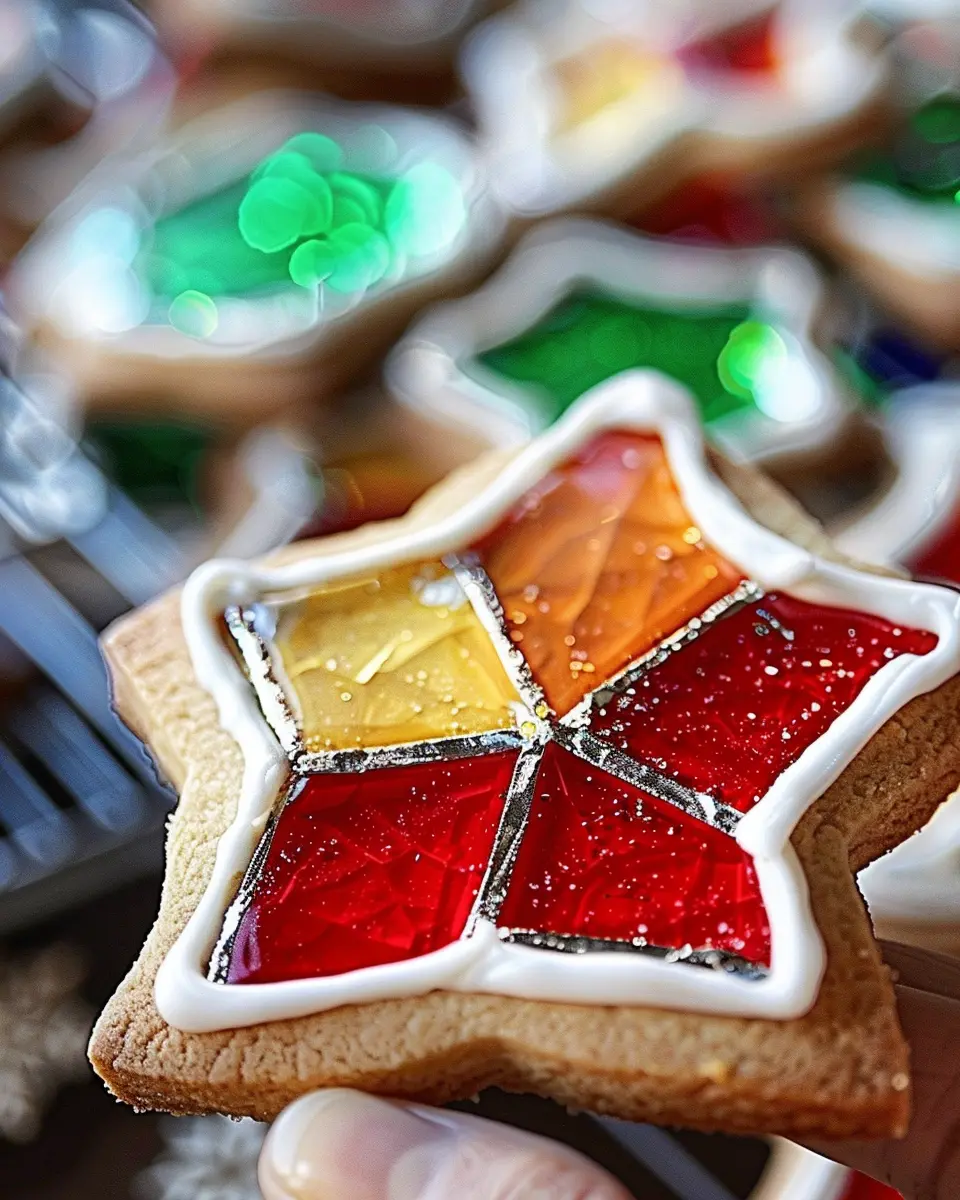
After chilling, it’s time to roll out the dough. On a lightly floured surface, roll out the dough to about 1/4-inch thickness. Use cookie cutters to create festive shapes—think stars, Christmas trees, and gingerbread men. Now here’s the fun part! Use a smaller cookie cutter to cut out shapes from the center of your cookies—this is where the stained glass effect will come to life.
Baking the Cookies
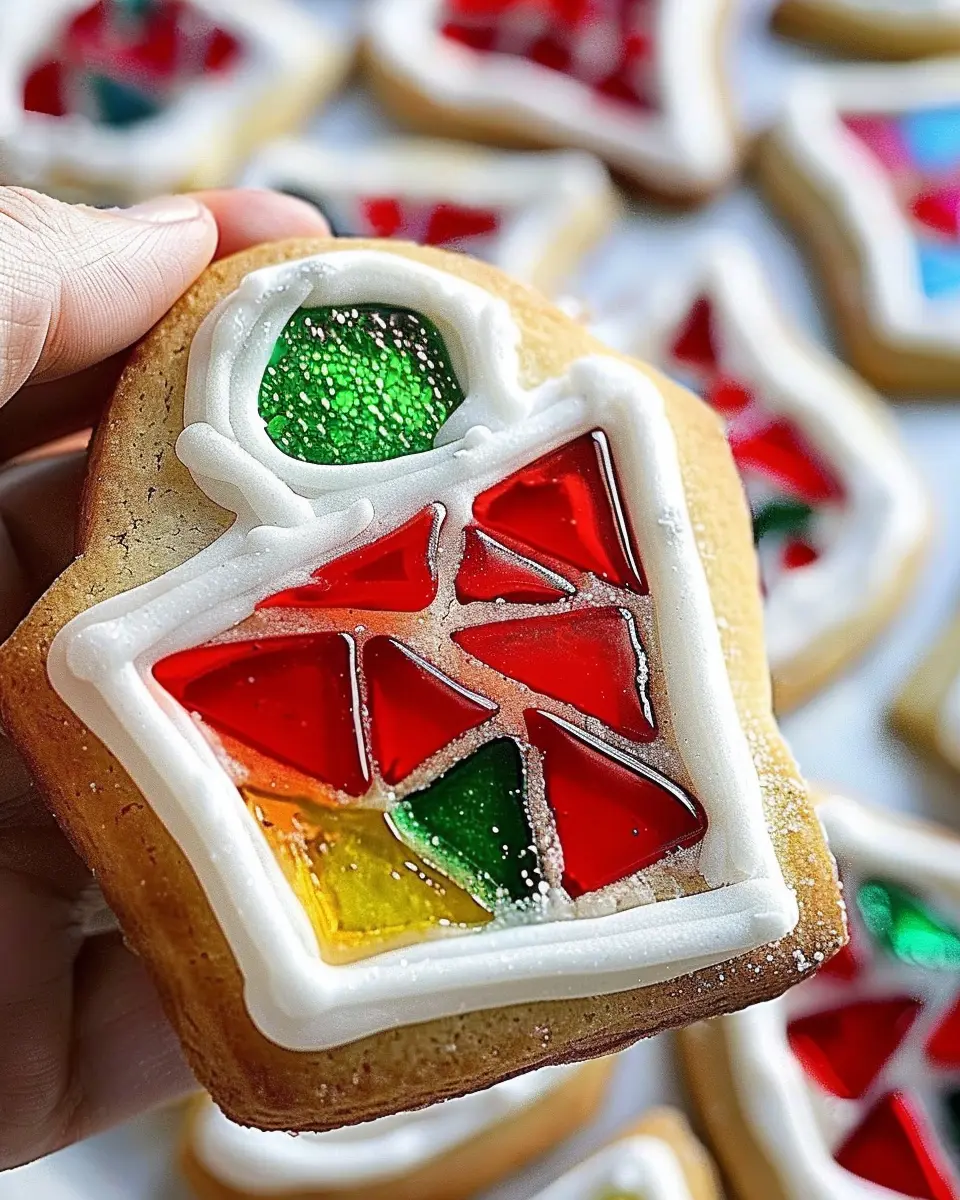
Preheat your oven to 350°F (175°C). Place the cookie shapes on a baking sheet lined with parchment paper, then crush your colorful hard candies and fill the cut-out areas. The candies will melt and create that beautiful glass-like effect.
Bake the cookies for about 8-10 minutes or until the edges are golden. Keep an eye on them; every oven is different! Let them cool on the baking sheet for a few moments before transferring them to a wire rack to cool completely.
Making the Buttercream Frosting
While the cookies cool, let’s whip up some buttercream frosting. You’ll need:
- 1/2 cup unsalted butter, softened
- 2 cups powdered sugar
- 1 teaspoon vanilla extract
- 2 tablespoons milk or cream (adjust for desired consistency)
In a mixing bowl, beat the softened butter until smooth. Gradually add the powdered sugar, mixing on low until combined, then add vanilla and milk. Beat until fluffy and smooth, adjusting with more milk if needed.
Decorating the Cookies
Now comes the best part—decorating! Once your cookies are completely cool, use a piping bag or a spatula to spread or pipe the frosting. Feel free to get creative with designs! You can sprinkle some edible glitter on top or use colored sugar to add a festive touch.
When everything is decorated, let the cookies sit for a while to allow the frosting to set. Then, they’re ready to be enjoyed by your family and friends, or stored in airtight containers for later!
Whether they serve as beautiful decorations or sweet treats at your holiday party, you’ll find that these stained glass Christmas cookies not only taste wonderful but add a colorful sparkle to your festive celebrations. Happy baking!
Variations on Stained Glass Christmas Cookies
Festive Alternative Shapes and Sizes
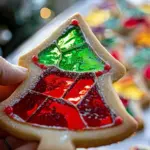
When it comes to making stained glass Christmas cookies, there’s so much room for creativity! While traditional star and tree shapes are always a hit, why not try some whimsical alternatives? Consider using:
- Christmas ornaments: Perfect for decorating your holiday tree.
- Snowflakes: A bit more delicate and can be intricately shaped.
- Angels or Santas: Adding layers of charm to your cookie platter.
Using different sizes can also make a big impact—miniature versions are perfect for gifting or holiday gatherings, while oversized cookies can serve as the dazzling centerpiece of your dessert table. The key is to use various cookie cutters to unlock a festive treasure trove of shapes!
Flavor Variations for Cookie Dough
While the classic vanilla or almond flavor reigns supreme, think about spicing things up! You could infuse your stained glass Christmas cookies with:
- Peppermint: Adds a refreshing twist that screams the holiday season.
- Cinnamon: For a warm, comforting flavor that pairs beautifully with any color of candy.
- Ginger: A subtle nod to gingerbread cookies, adding depth to your dough.
Don’t hesitate to experiment a little! A sprinkle of nutmeg or a dash of citrus zest can transform your dough into something special. If you’re curious about these flavor enhancements, check out this resource for more ideas.
Incorporating these variations not only keeps your baking exciting but encourages everyone to find their favorite cookie flavor. After all, what’s a holiday celebration without a little taste adventure?
Cooking Tips and Notes for Stained Glass Christmas Cookies
Best practices for rolling and cutting dough
Making stained glass Christmas cookies can be a delightful endeavor, but getting the dough just right is key. Start by rolling your dough between two sheets of parchment paper. This prevents sticking and makes transferring easy! Keep your dough chilled; if it becomes too warm, it can lose its shape when cut. Remember, the thicker you cut your cookies, the more support they’ll have when you add the candy later.
Troubleshooting common cookie issues
Sometimes, cookie-making doesn’t go as planned. If your stained glass Christmas cookies spread too much, check your oven temperature with a thermometer; an overheating oven can cause this problem. For cookies that are too hard, ensure you’re not overbaking them. Generally, a small window of two to three minutes in baking time can make a huge difference.
Turning to sources like The Kitchn or Food Network can provide additional baking wisdom and troubleshooting tips. Happy baking!
Serving Suggestions for Stained Glass Christmas Cookies
Creative presentation ideas
When it comes to stained glass Christmas cookies, presentation is everything. Arrange your beautiful cookies on a festive platter adorned with pinecones and holly for a touch of rustic charm. Consider placing them in a clear jar tied with a ribbon for a whimsical gift idea. For a more interactive experience, create a cookie decorating station with icing and edible glitter, inviting guests to personalize their own treats.
Perfect pairings for your cookies
These stunning cookies pair perfectly with various beverages to complete your holiday spread. Serve them alongside a warm cup of spiced hot chocolate or a refreshing cranberry lemonade. You might also impress your guests with a rich chai tea, which complements the sugary sweetness beautifully. For added flair, offer some Turkey Bacon or Chicken Ham bites as a savory contrast to balance the sweetness of the cookies.
For more creative serving ideas, check out blogs like Taste of Home and Martha Stewart for inspiration. Enjoy the process, and remember: the holiday spirit is all about sharing joy!
Time Breakdown for Stained Glass Christmas Cookies
Preparation Time
The preparation for your stained glass Christmas cookies takes about 30 minutes. This includes gathering your ingredients, mixing the dough, and cutting out those charming cookie shapes. Make sure to enjoy the process—play some holiday music to get in the spirit!
Baking Time
Once your cookies are prepped, it’s time to bake! Set your oven to 350°F (175°C) and bake them for about 8-10 minutes. You want to keep an eye on them so they don’t over-bake; a perfect cookie is golden with slightly soft centers.
Total Time Needed
Adding it all together, from start to finish, your stained glass Christmas cookies will take around 40 minutes. So grab your apron and get ready to indulge in some holiday cheer! For those interested in creating beautiful decorations, you might find inspiration at The Cookie Decorator!
Nutritional Facts for Stained Glass Christmas Cookies
When you’re whipping up Stained Glass Christmas Cookies, it’s good to have a clear picture of the nutritional content. These festive delights pack a little sweetness and fun but can be enjoyed in moderation.
Calories per cookie
On average, each cookie contains approximately 100 calories. This makes them a wonderful treat that can fit into your holiday celebrations without derailing your healthy eating goals.
Breakdown of sugars and fats
- Sugars: Each cookie holds around 8 grams of sugar, primarily from the colored hard candies that create the beautiful stained glass effect.
- Fats: Expect about 3 grams of fat per cookie. This includes essential fats from the butter, which contributes to the cookie’s delightful texture.
By keeping these numbers in mind, you can savor your Stained Glass Christmas Cookies while still being mindful of your overall dietary needs. Remember, balance is key during the holiday season! For more on maintaining healthy habits, consider checking out Healthline’s nutrition articles.
FAQs about Stained Glass Christmas Cookies
When it comes to creating festive culinary art, stained glass Christmas cookies stand out as vibrant crowd-pleasers. But once you’ve crafted these stunning treats, you might have some questions about enjoying them to the fullest. Let’s dive into your most pressing concerns!
How long can I store these cookies?
Stained glass Christmas cookies can be stored at room temperature in an airtight container for up to one week. This ensures they stay fresh and flavorful! If you’re looking for a longer shelf life, consider placing parchment paper between layers to prevent them from sticking together.
Can I freeze stained glass cookies?
Absolutely! Freezing is a fantastic way to preserve your stained glass cookies. Simply place them in a single layer on a baking sheet to freeze them individually, then transfer them to an airtight container or freezer bag. They can be frozen for up to three months. This is perfect for prepping ahead of holiday gatherings! When you’re ready to enjoy them, just let them thaw at room temperature.
What’s the best way to clean up after making these cookies?
Cleaning up after your cookie-making session doesn’t have to be a headache. Here are some tips:
- Immediate Wipe Down: Clean surfaces and utensils right after use to prevent hardened dough from sticking.
- Soak Tools: For any sticky spoons or rolling pins, soak them in warm, soapy water before scrubbing.
- Countertop Help: Use a mixture of vinegar and baking soda for any stubborn stains on your countertops.
Be sure to check out The Spruce Eats for more tips on kitchen cleanup and efficiency. Happy baking and enjoy your stained glass Christmas cookies!
Conclusion on Stained Glass Christmas Cookies
As you finish baking your beautiful stained glass Christmas cookies, take a moment to admire your creation. These delightful treats not only taste amazing but also add a vibrant touch to your holiday celebrations. Remember, sharing is caring! Encourage your friends and family to enjoy these cookies together. There’s nothing quite like gathering around with loved ones, sharing stories, and indulging in festive goodies.
If you’ve tried this recipe, I’d love to hear about your experience. Did you put your twist on it? Share your thoughts and photos on social media and tag me! Let’s spread the joy of stained glass Christmas cookies this season. Happy baking!
For more inspiration, check out resources like Food Network and Sally’s Baking Addiction for additional tips and holiday recipes.
PrintStained Glass Christmas Cookies: Easy Festive Treats to Cherish
Delight in the festive spirit with these Stained Glass Christmas Cookies, an easy and visually stunning treat for the holiday season.
- Prep Time: 30 minutes
- Cook Time: 10 minutes
- Total Time: 40 minutes
- Yield: 24 cookies 1x
- Category: Dessert
- Method: Baking
- Cuisine: American
- Diet: Vegetarian
Ingredients
- 2 3/4 cups all-purpose flour
- 1 teaspoon baking powder
- 1/2 teaspoon baking soda
- 1 teaspoon salt
- 1 cup unsalted butter, softened
- 1 1/2 cups granulated sugar
- 1 large egg
- 2 teaspoons vanilla extract
- 1 cup crushed hard candies (various colors)
Instructions
- Preheat the oven to 350°F (175°C).
- In a bowl, mix together flour, baking powder, baking soda, and salt.
- In a separate bowl, cream together butter and sugar until light and fluffy.
- Beat in the egg and vanilla extract.
- Gradually mix in the dry ingredients.
- Chill the dough for at least 30 minutes.
- Roll out the dough and cut into festive shapes.
- Cut out the center of each cookie and fill it with crushed candies.
- Bake for 8-10 minutes or until the edges are lightly golden.
- Allow to cool before serving.
Notes
- Use various colored candies for a more vibrant stained glass effect.
- Make sure to chill the dough to prevent spreading.
Nutrition
- Serving Size: 1 cookie
- Calories: 120
- Sugar: 8g
- Sodium: 50mg
- Fat: 6g
- Saturated Fat: 4g
- Unsaturated Fat: 2g
- Trans Fat: 0g
- Carbohydrates: 15g
- Fiber: 0g
- Protein: 1g
- Cholesterol: 20mg
Keywords: Stained Glass Christmas Cookies